
Who doesn’t love the idea of cupcakes on a stick? Well, today I’m excited to share a delightful treat straight from my kitchen: Red Velvet Cake Pops. These little bites of joy combine the rich, chocolatey flavor of red velvet cake with creamy frosting, all beautifully coated in chocolate. Perfect for parties, celebrations, or just a sweet afternoon snack, these cake pops are easy to make and utterly irresistible.
Red velvet cake has long been a classic favorite, its vibrant color and unique taste making it a standout dessert. What makes these cake pops so special is their versatility. You can customize them for any occasion, whether it’s a birthday party, a holiday gathering, or a simple dessert at home. Plus, they’re fantastic for portion control; after all, one bite-sized treat is much easier to enjoy than an entire slice of cake.
Ingredients
- 1 box of red velvet cake mix – for a homemade touch, try your favorite red velvet cake recipe
- 1 cup of prepared cream cheese frosting – or chocolate frosting if you prefer
- 12 ounces of white or dark candy coating – you can also use colored melting chocolate for fun designs
- Lollipop sticks – for that perfect presentation
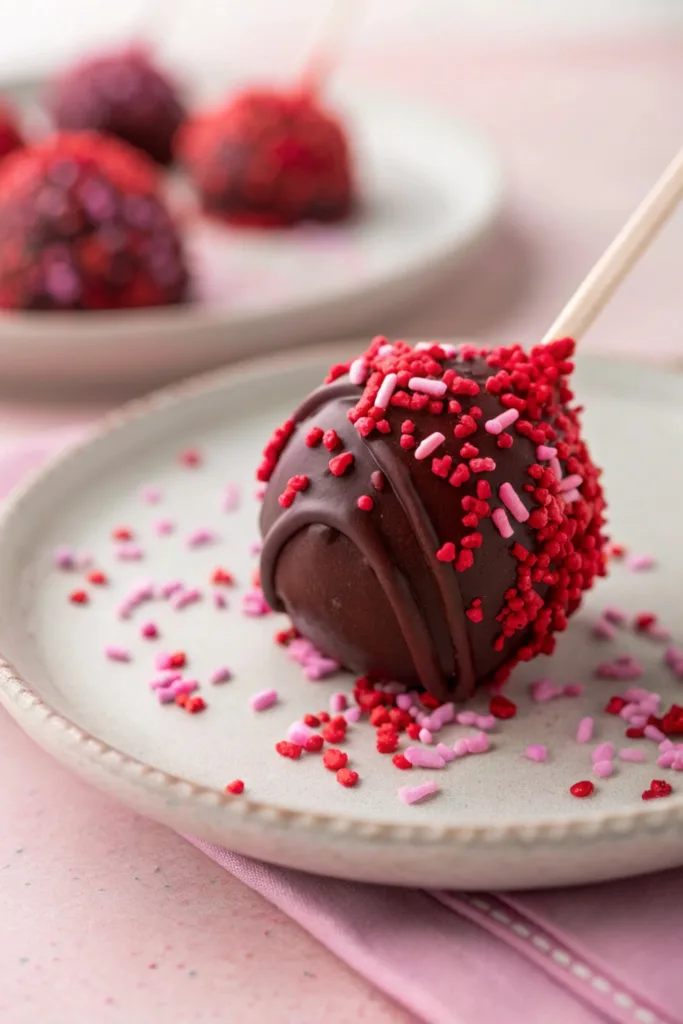
- Sprinkles or edible glitter – for a festive touch
Instructions
Step 1:
Prepare the red velvet cake mix according to the package instructions. Once baked, let it cool completely before crumbling it into a large bowl.
Step 2:
Add the cream cheese frosting to the crumbled cake, mixing well until it is fully combined. The mixture should be moist but not sticky.
Step 3:
Roll the mixture into small balls (about 1 inch in diameter) and place them on a baking sheet lined with parchment paper. Refrigerate the cake balls for at least 30 minutes to firm up.
Step 4:
Melt your candy coating in a microwave-safe bowl, stirring every 30 seconds until smooth.
Step 5:
Dip the end of each lollipop stick into the melted coating before inserting it into the center of a cake ball. This helps keep the stick secure.
Step 6:
Once all sticks are inserted, dip each cake pop into the melted candy coating, gently tapping off the excess.
Step 7:
Decorate with sprinkles or edible glitter while the coating is still wet. Allow the pops to set by placing them upright in a styrofoam block or a cake pop stand.
Nutritional Information
You’ll love indulging in these Red Velvet Cake Pops, but it’s also good to know the stats. Each cake pop is approximately 150 calories, with about 7 grams of fat and 18 grams of sugar. If you’re looking to enjoy while keeping an eye on calories, try sampling half a pop instead.
Healthier Alternatives
If you want to lighten these treats up a bit, consider making a few swaps. You can use low-fat cream cheese for the frosting or whole wheat flour in your cake mix. For a truly healthier option, you could even explore making them with a homemade red velvet recipe using natural sweeteners like honey or maple syrup. Trust me, they’ll still be delicious.
Serving Suggestions
These Red Velvet Cake Pops are not just great for snacking; they make for stunning table centerpieces, too. Arrange them in a glass jar with some pretty ribbon, or use them as a favor for guests at your next event. They’re equally delightful served alongside a steaming mug of coffee or hot chocolate. Imagine the smiles when you present these at your next gathering.
Common Mistakes
One common hiccup with cake pops is them falling off the stick. Make sure to chill the cake balls before dipping them to ensure they hold their shape. Another tip: don’t rush the melting process; ensuring your candy coating is completely smooth will give your pops a lovely finish. Lastly, be careful when adding decorations; sprinkle while the coating is still wet for the best results.
Chef’s Notes
- For a chocolate lover’s twist, try using chocolate cake mix and chocolate frosting.
- Experiment with flavors – add a dash of vanilla extract or almond extract in the frosting for a unique taste.
- If you want to change things up, why not dip these pops in caramel instead of chocolate?
FAQs
- Q1: Can I make these ahead of time?
A1: Absolutely, these cake pops can be made up to 2 days in advance. Just store them in the refrigerator until you’re ready to serve. - Q2: How do I store leftover cake pops?
A2: Keep them in an airtight container in the fridge. They’ll last about a week, though I doubt they’ll last that long. - Q3: Can I freeze cake pops?
A3: Yes, to freeze, place them in a single layer on a baking sheet until solid, then transfer them to a freezer-safe container. They’ll be good for up to a month.
If you love the vibrant flavors of red velvet, don’t forget to check out my Red Velvet Cake Truffles for another indulgent treat, or try my delightful Red Velvet Waffles for a fun breakfast twist. I can’t wait for you to enjoy these Red Velvet Cake Pops, whether at a celebration or just for yourself. Happy baking, friend!
Print
Red Velvet Cake Pops
- Total Time: 1 hour 15 minutes
- Yield: 24 cake pops 1x
Description
These Red Velvet Cake Pops are the ultimate treat, bite-sized, sweet, and dressed for any occasion. Moist cake mixed with rich frosting, coated in candy, and topped with fun sprinkles.
Ingredients
- 1 box of red velvet cake mix (or use your favorite homemade recipe)
- 1 cup cream cheese frosting (or chocolate, if desired)
- 12 oz white or dark candy melts (colored melts work too)
- Lollipop sticks
- Sprinkles or edible glitter for decoration
Instructions
- Prepare the red velvet cake as directed on the box. Let it cool, then crumble it into a large bowl.
- Mix in the cream cheese frosting until fully combined and the texture is moist, not sticky.
- Roll the mixture into 1-inch balls and place on a parchment-lined tray. Chill for 30 minutes.
- Melt the candy coating in a microwave-safe bowl, stirring every 30 seconds until smooth.
- Dip the tip of each lollipop stick into the melted coating, then insert it into a cake ball to help secure it.
- Coat each cake pop by dipping into the melted candy, tapping off excess gently.
- While still wet, decorate with sprinkles or glitter, then place upright to set in a styrofoam block or cake pop stand.
Notes
Chilling the cake balls before dipping prevents them from falling off the stick. Don’t rush the melting; smooth candy coating makes a big difference. For flavor variations, try chocolate cake or flavored extracts in the frosting.
- Prep Time: 45 minutes
- Cook Time: 30 minutes
- Category: Dessert
- Method: No-Bake
- Cuisine: American
Nutrition
- Serving Size: 1 cake pop
- Calories: 150
- Sugar: 18g
- Sodium: 95mg
- Fat: 7g
- Saturated Fat: 4g
- Unsaturated Fat: 2g
- Trans Fat: 0g
- Carbohydrates: 20g
- Fiber: 0g
- Protein: 1g
- Cholesterol: 10mg
Keywords: red velvet, cake pops, party dessert, kid-friendly, chocolate coated